Reviewing 40 Medical Icons for Embroidery Projects
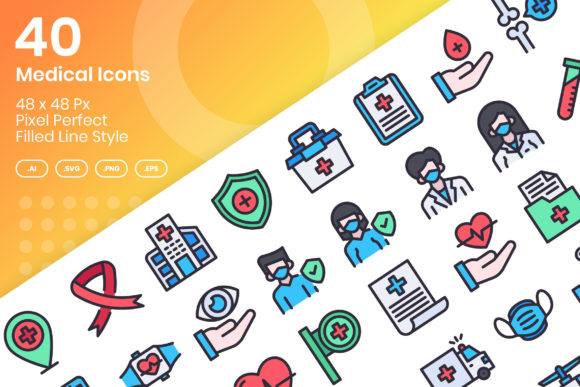
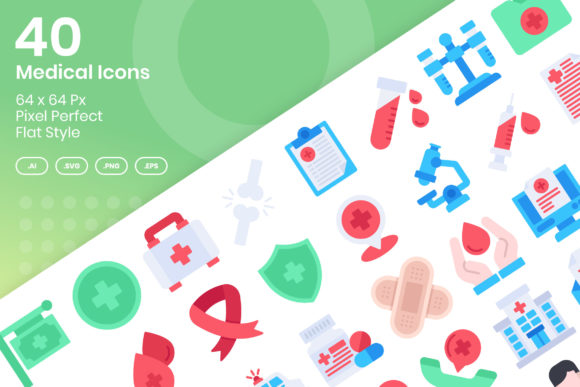
As a designer who spends half my life digitizing and the other half stitching, I have learned that not every graphic translates well to thread. When I first opened the 40 Medical Icons - Flat package, my immediate reaction was cautious optimism. The description promises pixel-perfect vectors based on a 64 x 64 px grid, which sounds ideal for digital screens, but embroidery is a different beast entirely. We are not dealing with pixels; we are dealing with thread tension, fabric pull, and the physical limitations of a needle.
This review is written for those of us who run small shops, sell on Etsy, or create personalized gifts for clients. We need to know if these Graphics will hold up when turned into a tangible handmade product. Let’s break down how this set performs in the real world of stitch work.
The First Impression: Clean Lines vs. Stitch Reality
The visual personality of the 40 Medical Icons - Flat set is undeniably clean. The flat style means there are no gradients or complex shading, which is a huge advantage for embroidery. Complex shading often requires thousands of stitches and can look muddy on textured fabrics. These icons rely on shape and silhouette, which translates beautifully to satin stitch borders and simple fill stitch areas.
However, the "flat" aesthetic can be deceptive. In digital design, a thin line is just a few pixels wide. In embroidery, a line thinner than 0.5mm can easily break or get lost in the fabric texture. My first step with any new embroidery file is to inspect the smallest details. Since these are vector-based and easy to resize, you have control, but you must respect the minimum stitch width. If you shrink these icons too much for a tiny embroidered patch, you risk losing clarity.
A Real-World Test: The Custom Tote Bag
To truly evaluate utility, I imagined a common client request: a custom tote bag for a nursing student graduation. This is a classic scenario for custom apparel and accessories. I selected three icons from the set—a stethoscope, a heart rate monitor line, and a medical cross.
For a tote bag design, durability is key. Canvas is a sturdy fabric, but it has a visible weave. I found that the bolder icons in the set held up significantly better than the finer ones. The heart rate icon, with its jagged line, required careful digitizing adjustment to ensure the running stitch didn’t look like a broken zipper. By increasing the stitch density slightly and using a thicker thread weight, the design popped against the natural canvas color. The result was professional, recognizable, and sturdy enough for daily use.
This experience highlighted a crucial point: while the source files are ready-to-use vectors, they are not necessarily ready-to-stitch machine embroidery design files without some oversight. You must consider the end product. For a sweatshirt embroidery project, the same icons would need a different approach due to the stretch and pile of the fabric.
Versatility Across Products
The strength of this collection lies in its variety. With 40 distinct symbols, you can create cohesive branding for medical professionals. Imagine using these for:
- Baby embroidery on onesies for pediatric nurse parents.
- Holiday embroidery on aprons for healthcare workers during festive seasons.
- Personalized gift items like pillow covers or blankets for hospital staff.
- Small shop product lines featuring niche medical specialties.
Each application demands a different technical approach. For baby clothes, softness is paramount. You would want to minimize dense stitching to prevent stiffness against sensitive skin. Here, the simpler icons work best, perhaps outlined with a satin stitch and left unfilled, or filled with a light, airy pattern. Conversely, for a commercial embroidery project like uniform polos, durability and washability are the priorities. A denser fill stitch ensures the logo survives industrial laundering.
Where Caution Is Needed
Not every icon in the 40 Medical Icons - Flat set is created equal for embroidery. Some designs feature sharp corners or intricate internal details that can cause thread breaks or bird nests if not properly underlaid. When working on curved surfaces like caps or hats, these small details can distort. The hoop tension pulls the fabric, and a complex, small icon can become unrecognizable.
Additionally, be mindful of dark fabrics. If you are stitching white thread on navy blue, you need high contrast and precise registration. Any gap in the stitching will show the background fabric, ruining the "flat" look. Always test your thread colors on scrap fabric first. A printable mockup can help visualize the color combination, but nothing beats a physical test stitch.
Practical Designer Notes
Before you list these as part of your craft business inventory or use them for a client, follow these steps:
- Check the License: Ensure the license allows for commercial use of finished products. While the description mentions they are perfect for websites and apps, verify the terms for physical goods.
- Digitize with Care: If these are provided as vectors, you will need to digitize them yourself or convert them using reliable software. Pay attention to stabilizer selection. Cut-away stabilizer is usually best for stretchy fabrics, while tear-away works for stable woven materials.
- Test Hoop Sizes: Determine the optimal hoop size for each icon. Do not try to cram a detailed icon into a 4x4 hoop if it loses definition. Sometimes, scaling up is better than scaling down.
- Inspect Small Details: Zoom in on the vector. Are there anchor points that create unnecessary nodes? Simplify the path before digitizing to reduce stitch count and improve smoothness.
- Contrast Check: View your design in black and white. If the icon disappears in grayscale, it lacks the necessary contrast for embroidery on varied fabrics.
Final Verdict on Visual Appeal and Value
The 40 Medical Icons - Flat set offers strong potential for Etsy sellers and creative entrepreneurs targeting the healthcare niche. The clean, modern aesthetic appeals to a younger demographic of medical professionals who want stylish, rather than sterile, merchandise. When executed correctly, these designs enhance brand consistency and customer trust. They look intentional and professional, which increases the perceived value of your finished product.
However, success depends on your technical skill in translating these graphics into thread. They are not magic bullets; they are raw materials. Your expertise in choosing the right applique design techniques, managing stitch density, and selecting appropriate fabrics will determine whether the final item is a bestseller or a return. Use these icons as a foundation, but let your embroidery knowledge build the house. With careful preparation, this set can become a staple in your library of design assets for years to come.